What is ExecAPI?
ExecAPI is a background job execution platform that lets you quickly run jobs in multiple languages. It’s a great fit for any application that needs to perform periodic or one-off tasks like sending emails, resizing images, running reports, or ETL workloads.
A background job is defined by a workflow, which consists of a trigger, and one or more actions. The trigger is what actually starts the workflow. It can be a Cron expression that runs the workflow on a schedule, a webhook that accepts incoming requests to start the job on-demand, and many others.
The action is the code that you want to run. It can be anything that runs inside a Docker container, such as a Python script, Node.js script, bash script, or custom commands based on your own Docker image.
Actions run inside a secure sandbox, which itself runs in a virtualized environment to protect and secure your code from other actions that may be running. Actions are limited in how much CPU, RAM, and disk space they may use. You may increase these limits if, for instance, you need access to additional processing power or RAM to successfully run your background job.
To follow along with this guide, you’ll want to sign up first. Ready? Let’s go!
Your First Background Job
Let’s build something simple: a background job that periodically connects to a Postgres database and sends a Telegram message when it notices a new user has signed up. Conceptually, it’ll be simple:
Implementing this is easy. First, create a new workflow:
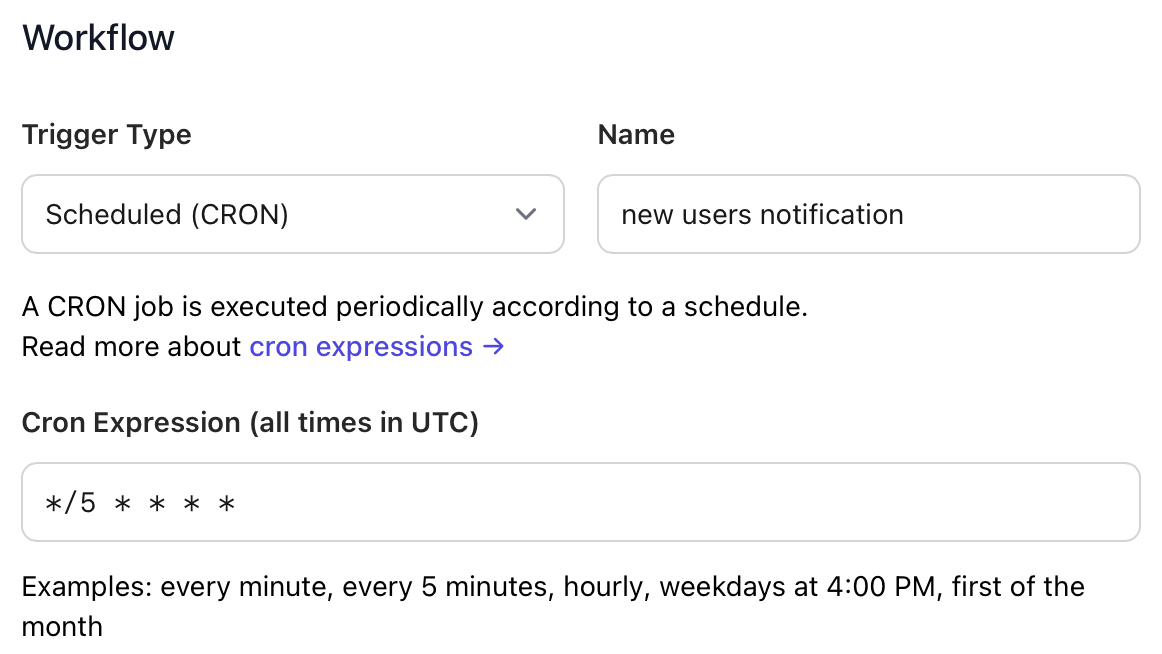
The cron expression */5 * * * * means “run every 5 minutes.”
- Send a message to @BotFather on Telegram and create a new bot.
- Make note of the HTTP API token.
- Start a chat with your bot and send any message.
- Find your Telegram user ID, by running the following Python script locally:
import requests

BOT_TOKEN = 'YOUR_BOT_TOKEN'

print(requests.get(f"https://api.telegram.org/bot{BOT_TOKEN}/getUpdates").json()['result'][0]['message']['from'])
- This will print out a JSON object containing your own user ID. This is who will receive our Telegram messages.
In the next section, choose Python for the action language, and paste the following into the code and dependencies tabs:
- Code
- Dependencies
import json
import psycopg2
import requests
from urllib.parse import quote

BOT_TOKEN = 'YOUR_BOT_TOKEN'
CHAT_ID = 'YOUR_USER_ID'

# Connect to the PostgreSQL database
conn = psycopg2.connect(
    database="DB_NAME",
    user="DB_USERNAME",
    password="DB_PASSWORD",
    host="DBHOST",
    port="5432",
    sslmode="require"
)

# Open a cursor to perform database operations
cur = conn.cursor()

# Execute a query
cur.execute("SELECT id, email FROM users WHERE inserted_at >= NOW() - INTERVAL '5 minutes'")

# Fetch all rows from the query result
rows = cur.fetchall()

message = ''

# Print the rows
for row in rows:
    print(row)
    (id, email) = row
    message += f"{id}: {email}\n"

# Close the cursor and database connection
cur.close()
conn.close()

# Send a Telegram message with the new users
message = quote(message)
url = f"https://api.telegram.org/bot{BOT_TOKEN}/sendMessage?chat_id={CHAT_ID}&text={message}"
print(requests.get(url).json())
requests==2.28.2
psycopg2==2.9.6
Save your workflow and click the Run Now button to execute it immediately. The first run of the workflow will take longer than usual, as dependencies are installed and cached. Subsequent executions will be noticeably faster.
Congratulations, you’ve built your first workflow! You can view execution logs for any workflow by choosing the relevant job in the workflow viewer.
ExecAPI is language-agnostic. If your language isn’t explicitly supported, use Bash and install any language runtimes using apt-get.